
The handful of physical properties that actually narrow things down, a simple order to test them in, and the honest limits of what you can determine at the kitchen table.
"What is this?" is the first question every collection asks of you, and it's deceptively hard. A green crystal could be a dozen species; the same species can show up in a dozen colors. Beginners reach for color first and get burned, because color is the least reliable property a mineral has.
The good news is that mineral identification is mostly a process of elimination, and a handful of cheap tests - done in the right order - will get you to a confident answer for the large majority of common specimens. The rest is knowing when to stop and call it tentative. Here's the whole workflow.
Before any tools, ask: Does it look metallic or not? A metallic luster (shiny like polished metal - pyrite, galena, hematite) versus a non-metallic one (glassy, dull, pearly, resinous, earthy) immediately halves your candidate list. This is luster, and it's the first cut every identification key makes.
Get specific about non-metallic luster, too - it's diagnostic on its own:
With luster noted, run these. None requires more than a few dollars of equipment.
1. Hardness (Mohs scale). What will scratch what. Build a cheap test kit from things you own: a fingernail (~2.5), a copper coin (~3.5), a steel knife or nail (~5.5), a piece of glass (~5.5), and a streak plate (~7). If your fingernail scratches it, it's very soft (gypsum, talc). If a knife won't but it scratches glass, you're up near quartz (7). Always scratch on an inconspicuous spot, and make sure you're scratching the mineral - not just leaving a metal smear that wipes off.
2. Streak. Drag the specimen across an unglazed porcelain tile and look at the powder color, which is often very different from the crystal's surface color and far more constant. Hematite streaks rust-red even when the crystal looks silvery-black; pyrite streaks greenish-black. Streak is most powerful for metallic and dark minerals. (It only works on minerals softer than the plate, around 7.)
3. Cleavage and fracture. How a mineral breaks is structural, so it's reliable. Cleavage is breakage along flat planes; count the directions and note the angles. Mica peels in one perfect direction; halite and galena cleave into cubes (three at 90); fluorite cleaves into octahedra; calcite into rhombs. No flat planes - a curved, shell-like break - is conchoidal fracture, classic for quartz. Cleavage versus fracture alone rules out huge swaths of the mineral kingdom.
4. Crystal habit. The shape the crystals actually take: cubic, prismatic, bladed, platy, botryoidal (grape-like), acicular (needles), dendritic. Habit plus the tests above is often enough to land a confident ID.
A few quick checks resolve the remaining ambiguities:
A word of caution: skip the old "taste it" (halite) and "lick it" tests unless you know exactly what you have. Plenty of minerals are toxic, and a few are genuinely dangerous to handle. When in doubt, don't put it in your mouth.
Two habits separate good identifiers from frustrated ones.
First, distrust color. Quartz alone comes clear, purple, pink, smoky, yellow, and brown. Trace impurities and treatments swing color wildly, so treat it as a weak hint, never proof.
Second, use locality - it does half the work. Where a specimen came from dramatically narrows what it can be, because each locality produces a known, finite suite of species. "Blue crystal from Brazil" plus a hardness near 7.5 and a hexagonal prism points hard at aquamarine; the same blue from a different deposit might be something else entirely. If you know the source, you've eliminated most of the candidates before you pick up a tool - which is exactly why serious collectors treat locality as core data, not a footnote (more on that in our cataloging guide).
This is also where a connected catalog earns its keep. On EarthWonders, every specimen's species and locality link straight to reference material, so you can check a candidate's properties and see what's actually known to occur where your piece is from - without leaving the record.
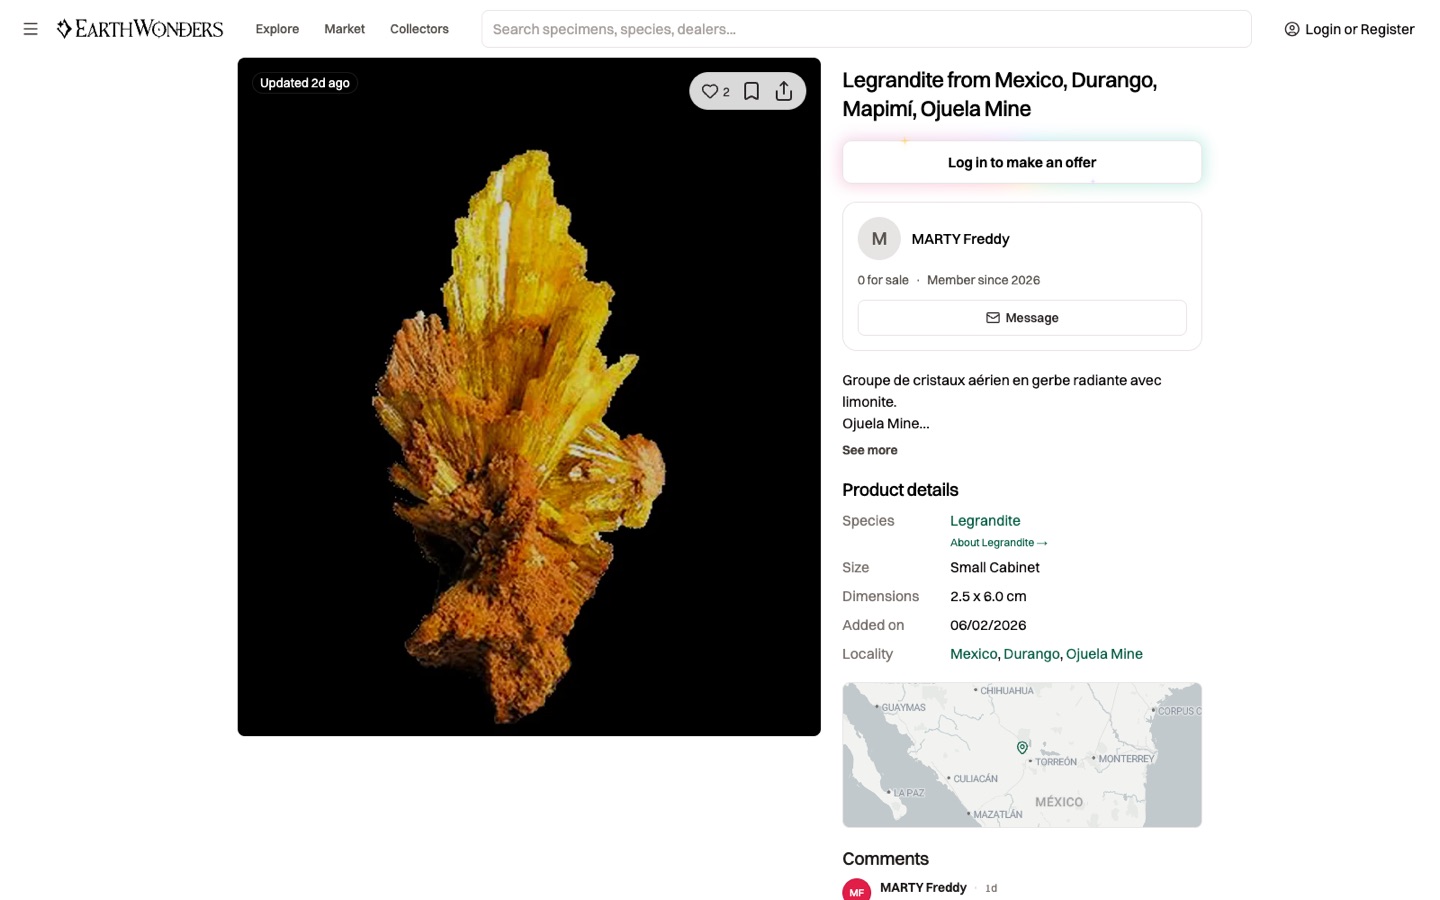
Each record links its species and locality to reference data and a map - so "what is it?" and "what occurs here?" sit side by side while you work an ID.
Half of identification is pattern recognition, and the fastest way to build it is to look at a lot of correctly-labeled material. A large, searchable gallery lets you filter to a species or a locality and study dozens of confirmed examples - how the habit really looks, the range of color, the typical associations.
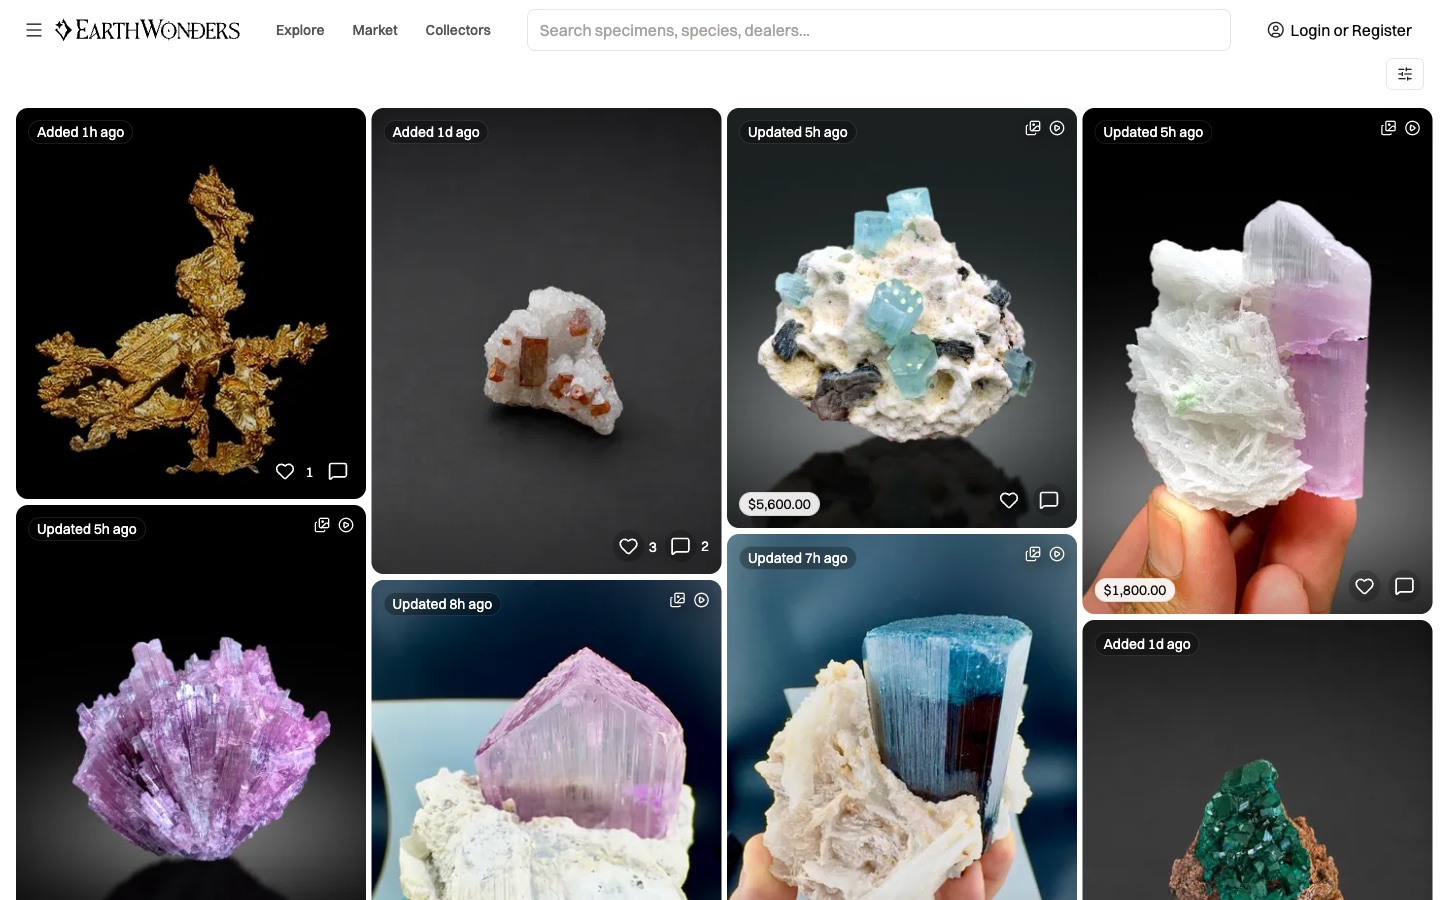
Filter to a species or locality and study confirmed examples side by side. Comparing your unknown against many identified pieces is how an eye for a mineral gets built.
Some identifications can't be settled at home. Altered material, fine-grained mixtures, rare species, and anything where value hinges on the exact answer may need lab methods (XRD, SEM, Raman) or an expert eye. That's not failure - it's discipline.
The cardinal rule: never record a guess as a fact. Flag an identification as tentative until it's verified by testing or an expert, and keep it that way in your catalog. A collection that quietly promotes hunches to certainties slowly loses its credibility - and so does the collector. If you're stuck, post clear, true-color photos to a knowledgeable community; a good photo set (here's how to shoot one) often gets you an answer faster than any single test.
Look at luster. Test hardness, streak, and how it breaks. Note the crystal habit. Run a special test or two if you're still torn. Treat color with suspicion and locality as gold. Then compare against known specimens - and if you can't be sure, say so and mark it tentative. Do that consistently and your identifications, and your collection's credibility, will both get steadily sharper.
Building a collection you can actually learn from? EarthWonders is free - every specimen links to species and locality references, you can mark IDs verified or tentative, and your catalog stays private until you choose to share it.